CO2 Room Air Monitor
How I built my own room air monitor with a raspberry pi and AWS. I used a sensor to measure the CO2, temperature and humidity and display this data on a nextjs site deployed to AWS
CO2 Room Air Monitor
What Did I build
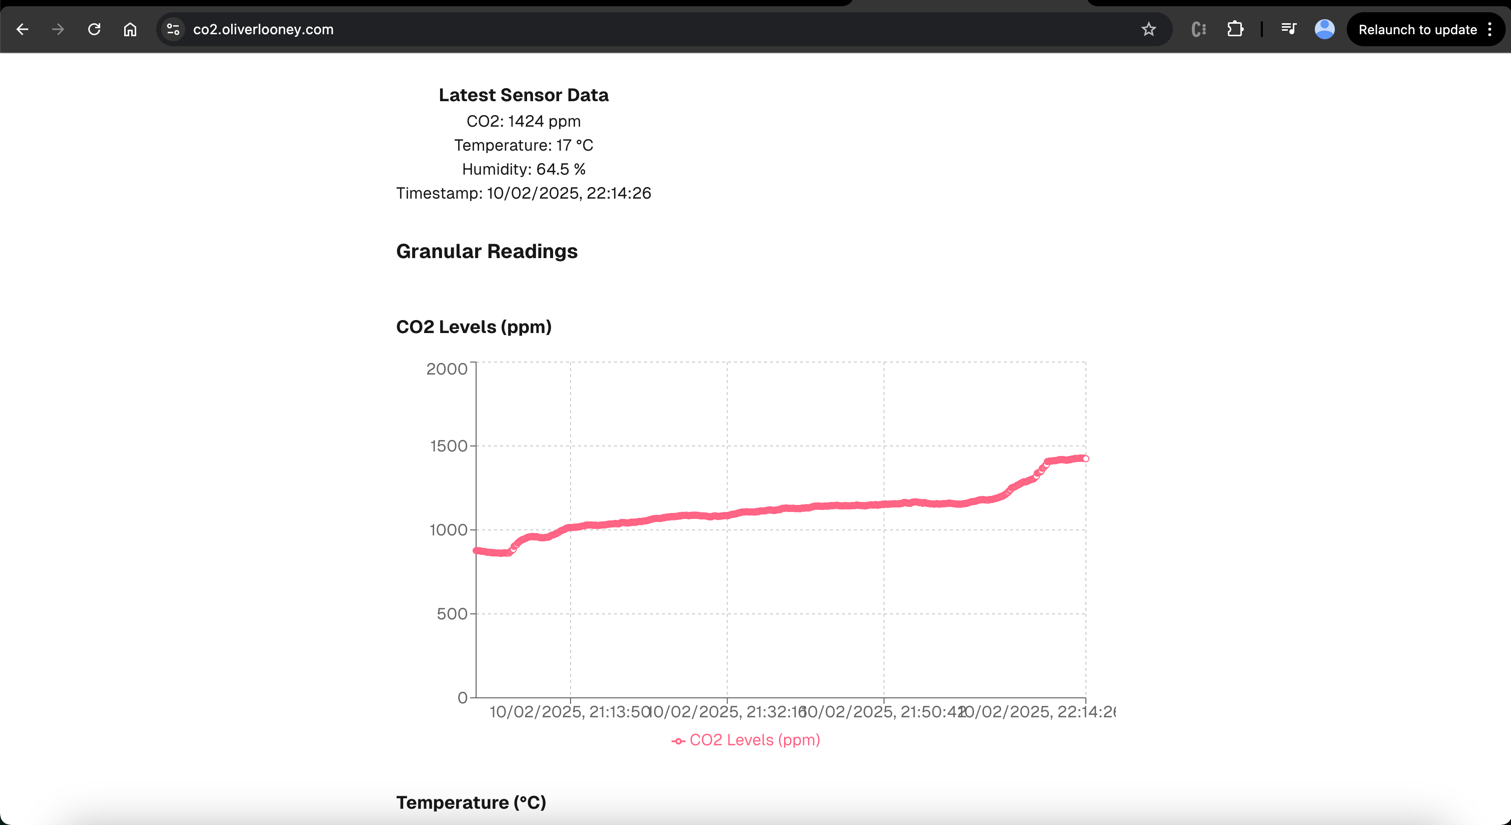
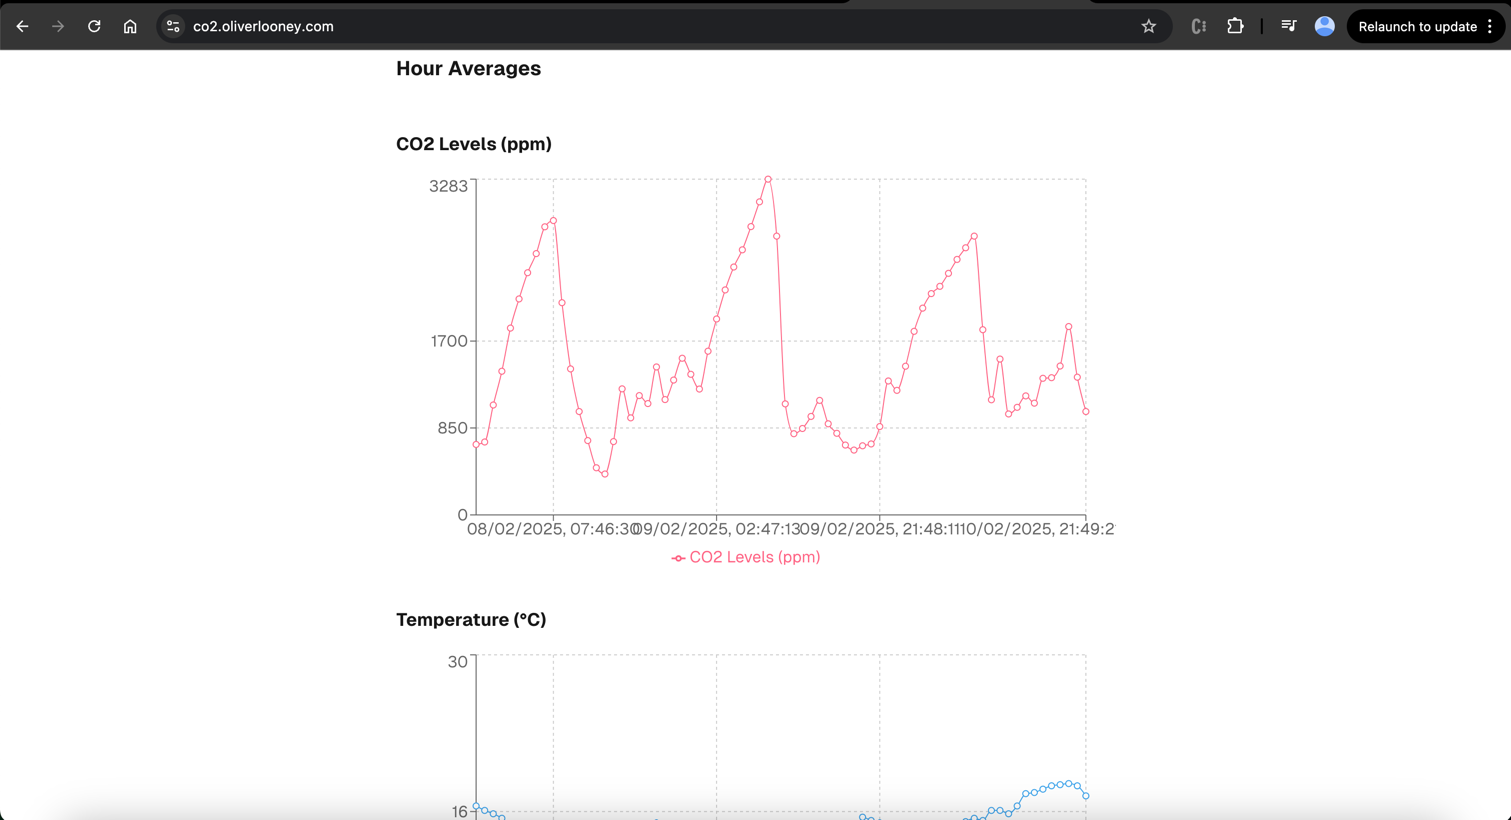
I built a room air monitor that records and displays CO2, temperature and relative humidity in different time increments.

I display the data in increments of 5 second readings, 1 minute averages and 1 hour averages. To make the graphs easier to read I display data for the last hour, last 12 hours and last 3 days for each respective time increment.
This setup allows me to easily track room air quality in my room over days and especially while I sleep while also being able to see the impact of opening windows or doors while I am working at my desk.
How did I build
Sensor
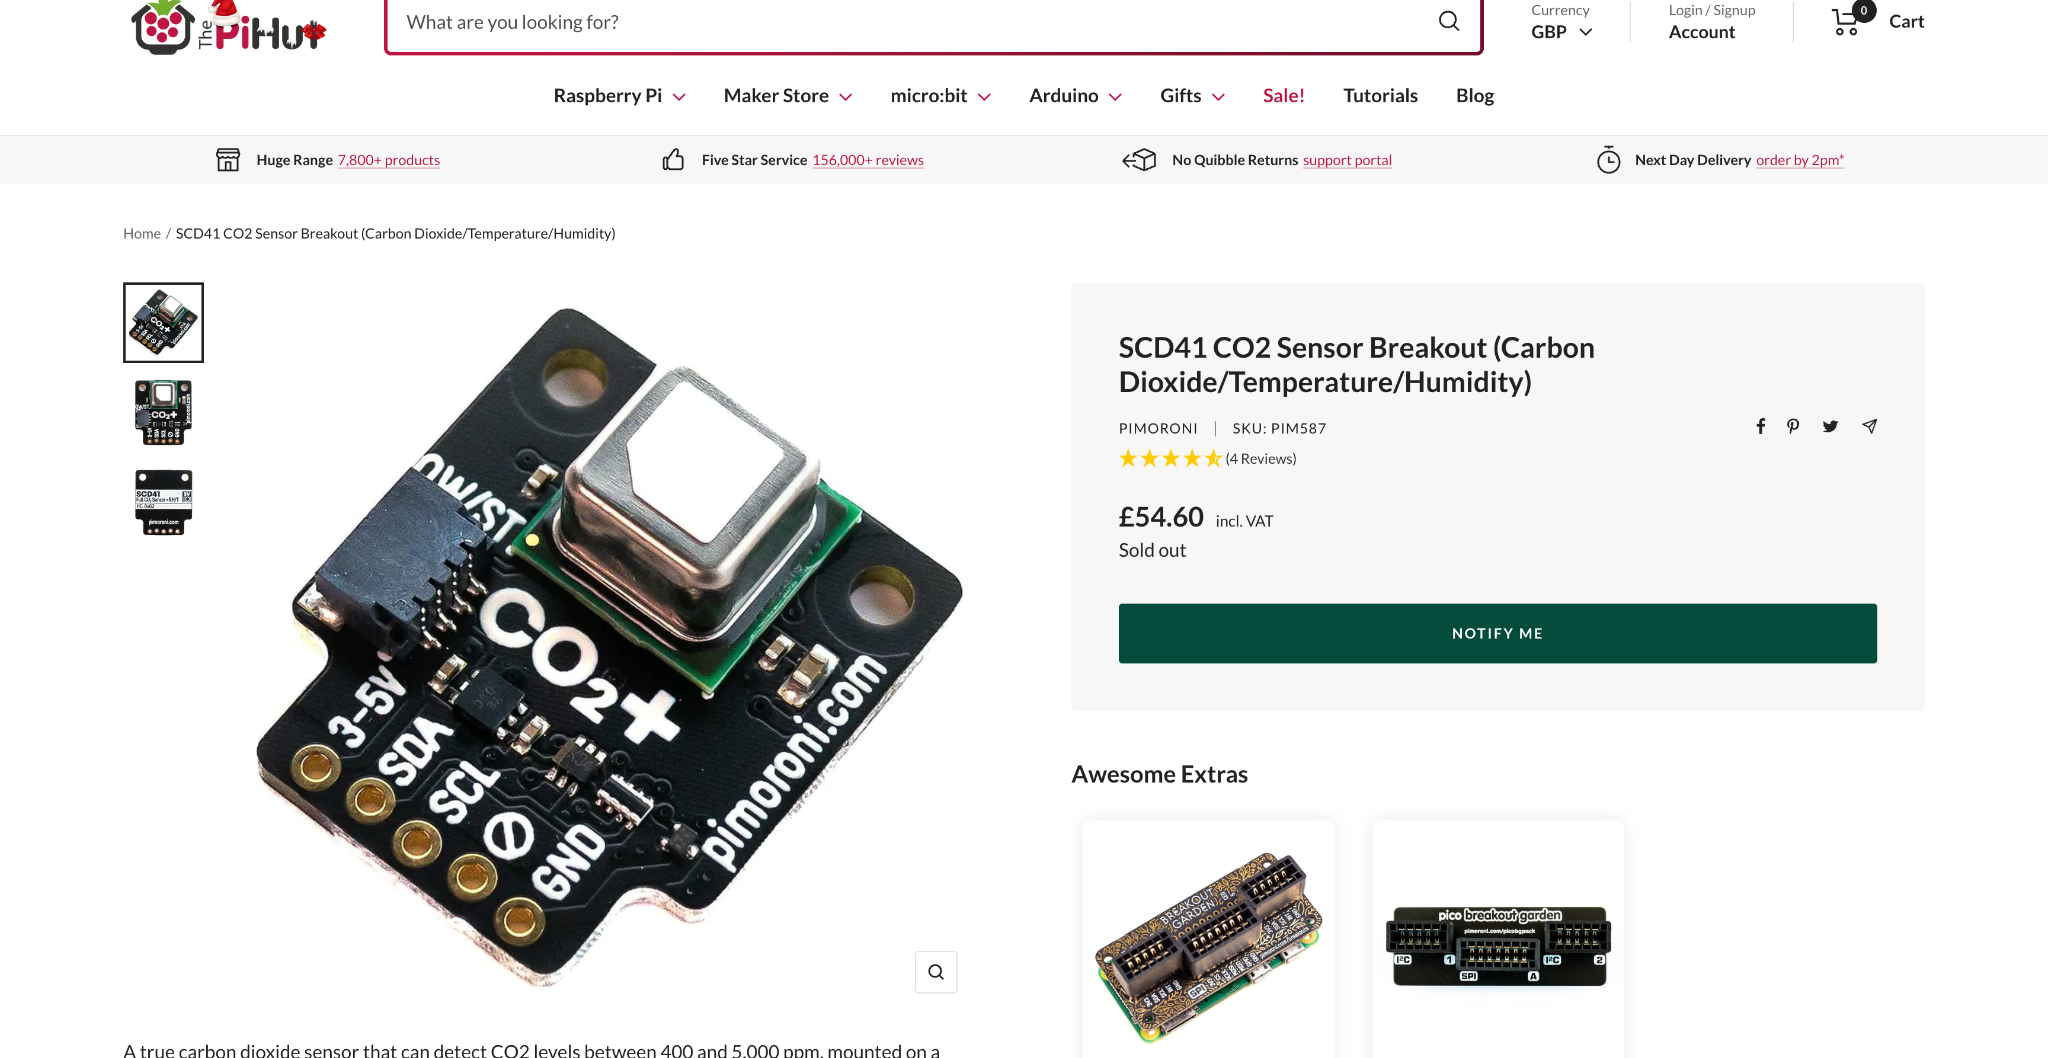
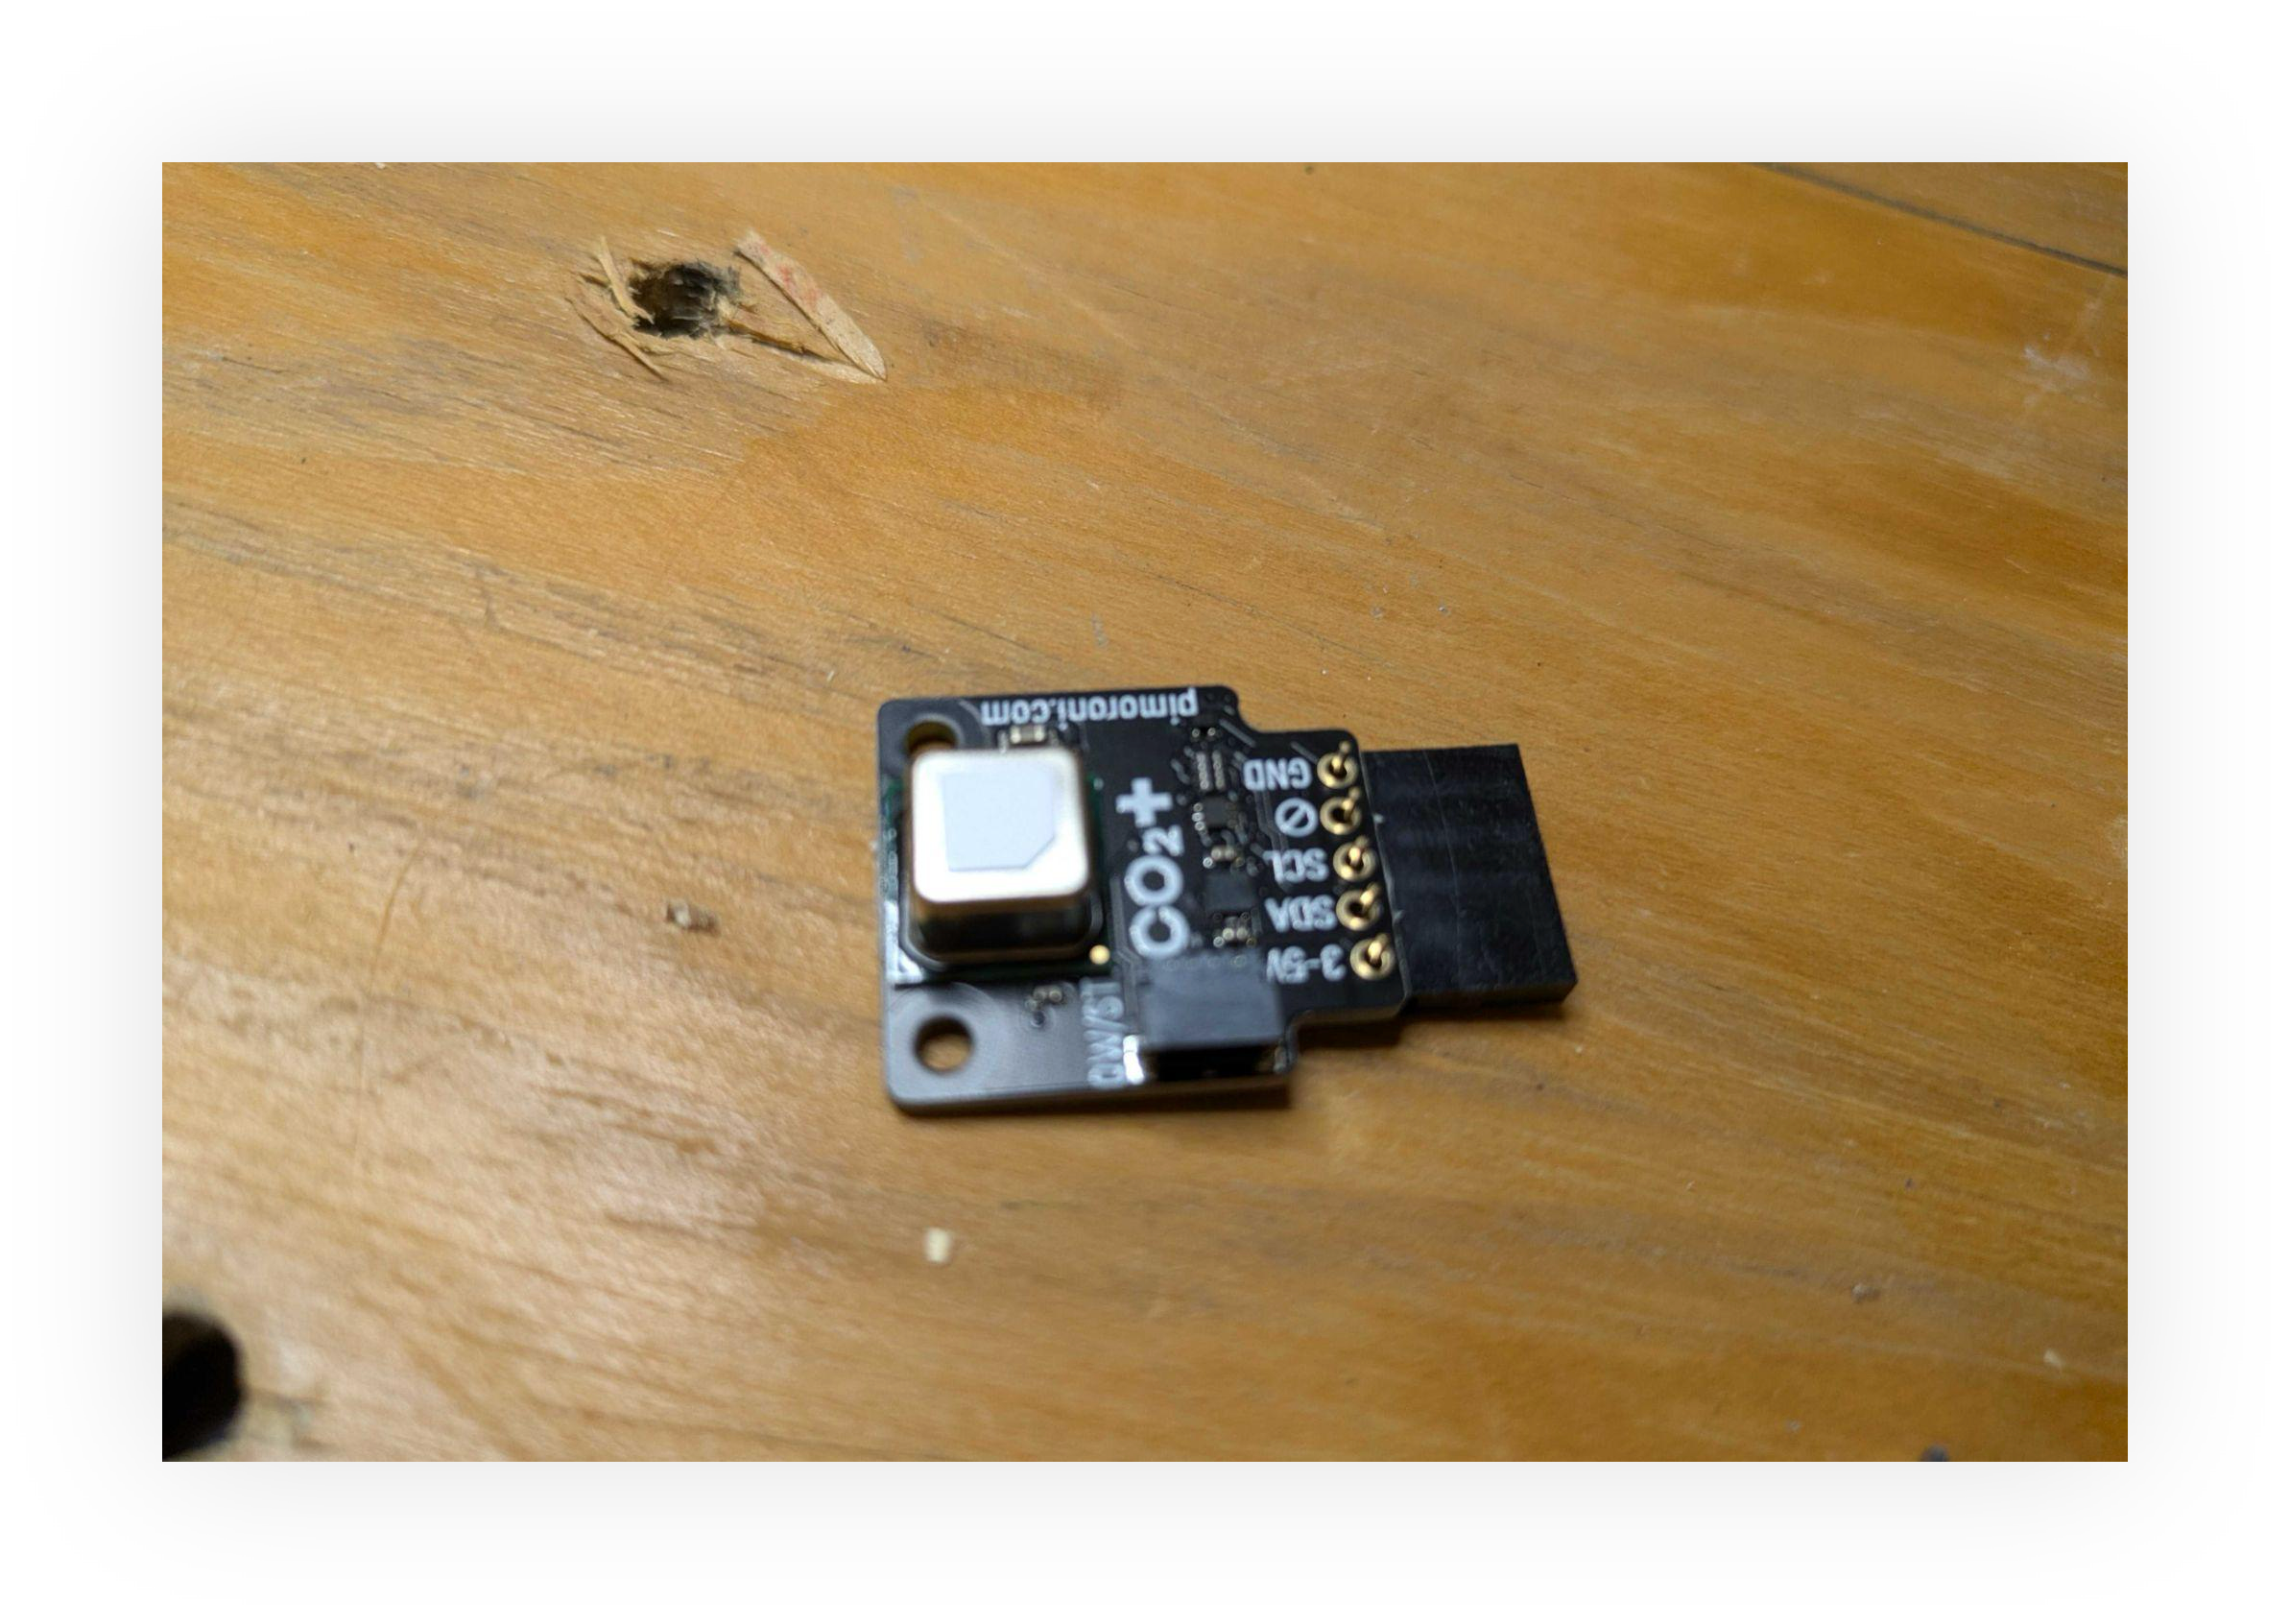
After researching different sensors I picked the SCD41 CO2 sensor, Click here to view sensor
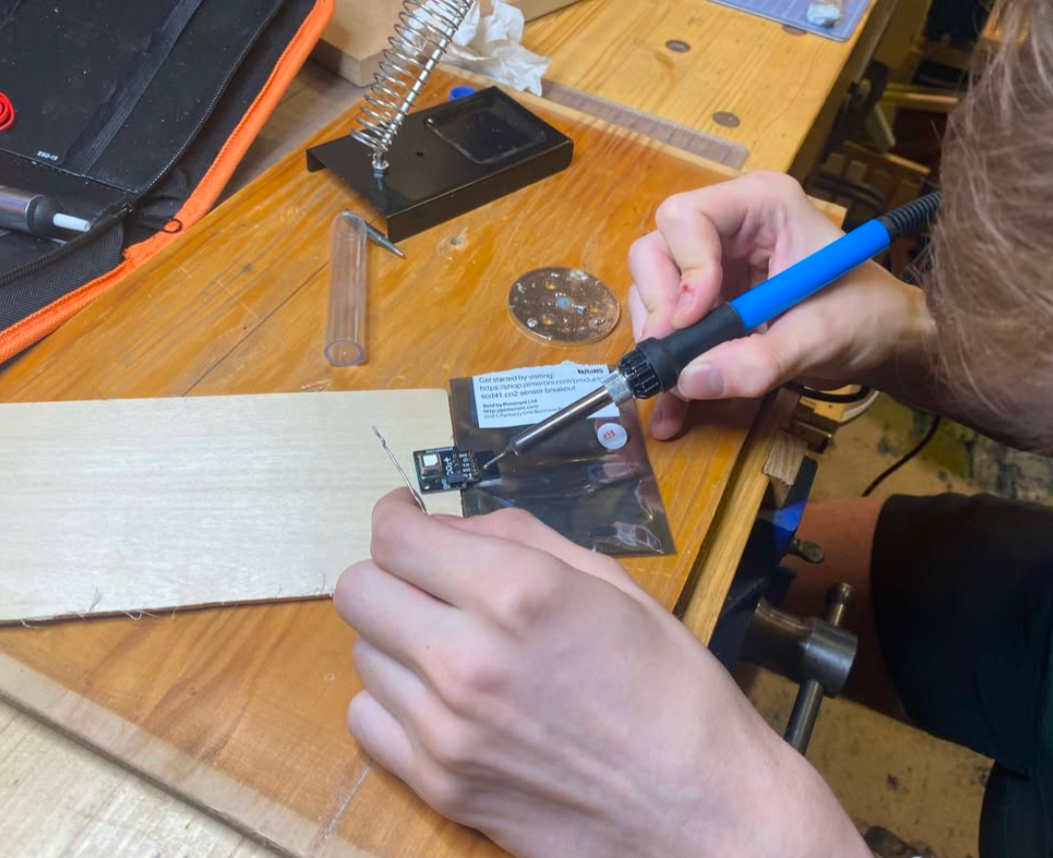
Soldering
I had to solder the sensor to the female to female adapter to be able to plug GPIO pins into the sensor. The last time I had soldered was ~10 years ago in Junior secondary school, so it was a bit of a learning experience!
Although very basic, this was a super cool experience.
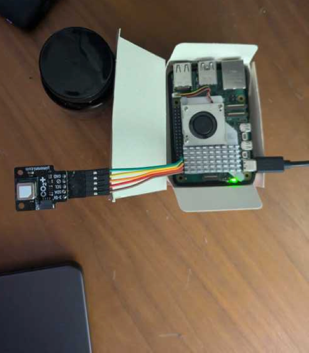
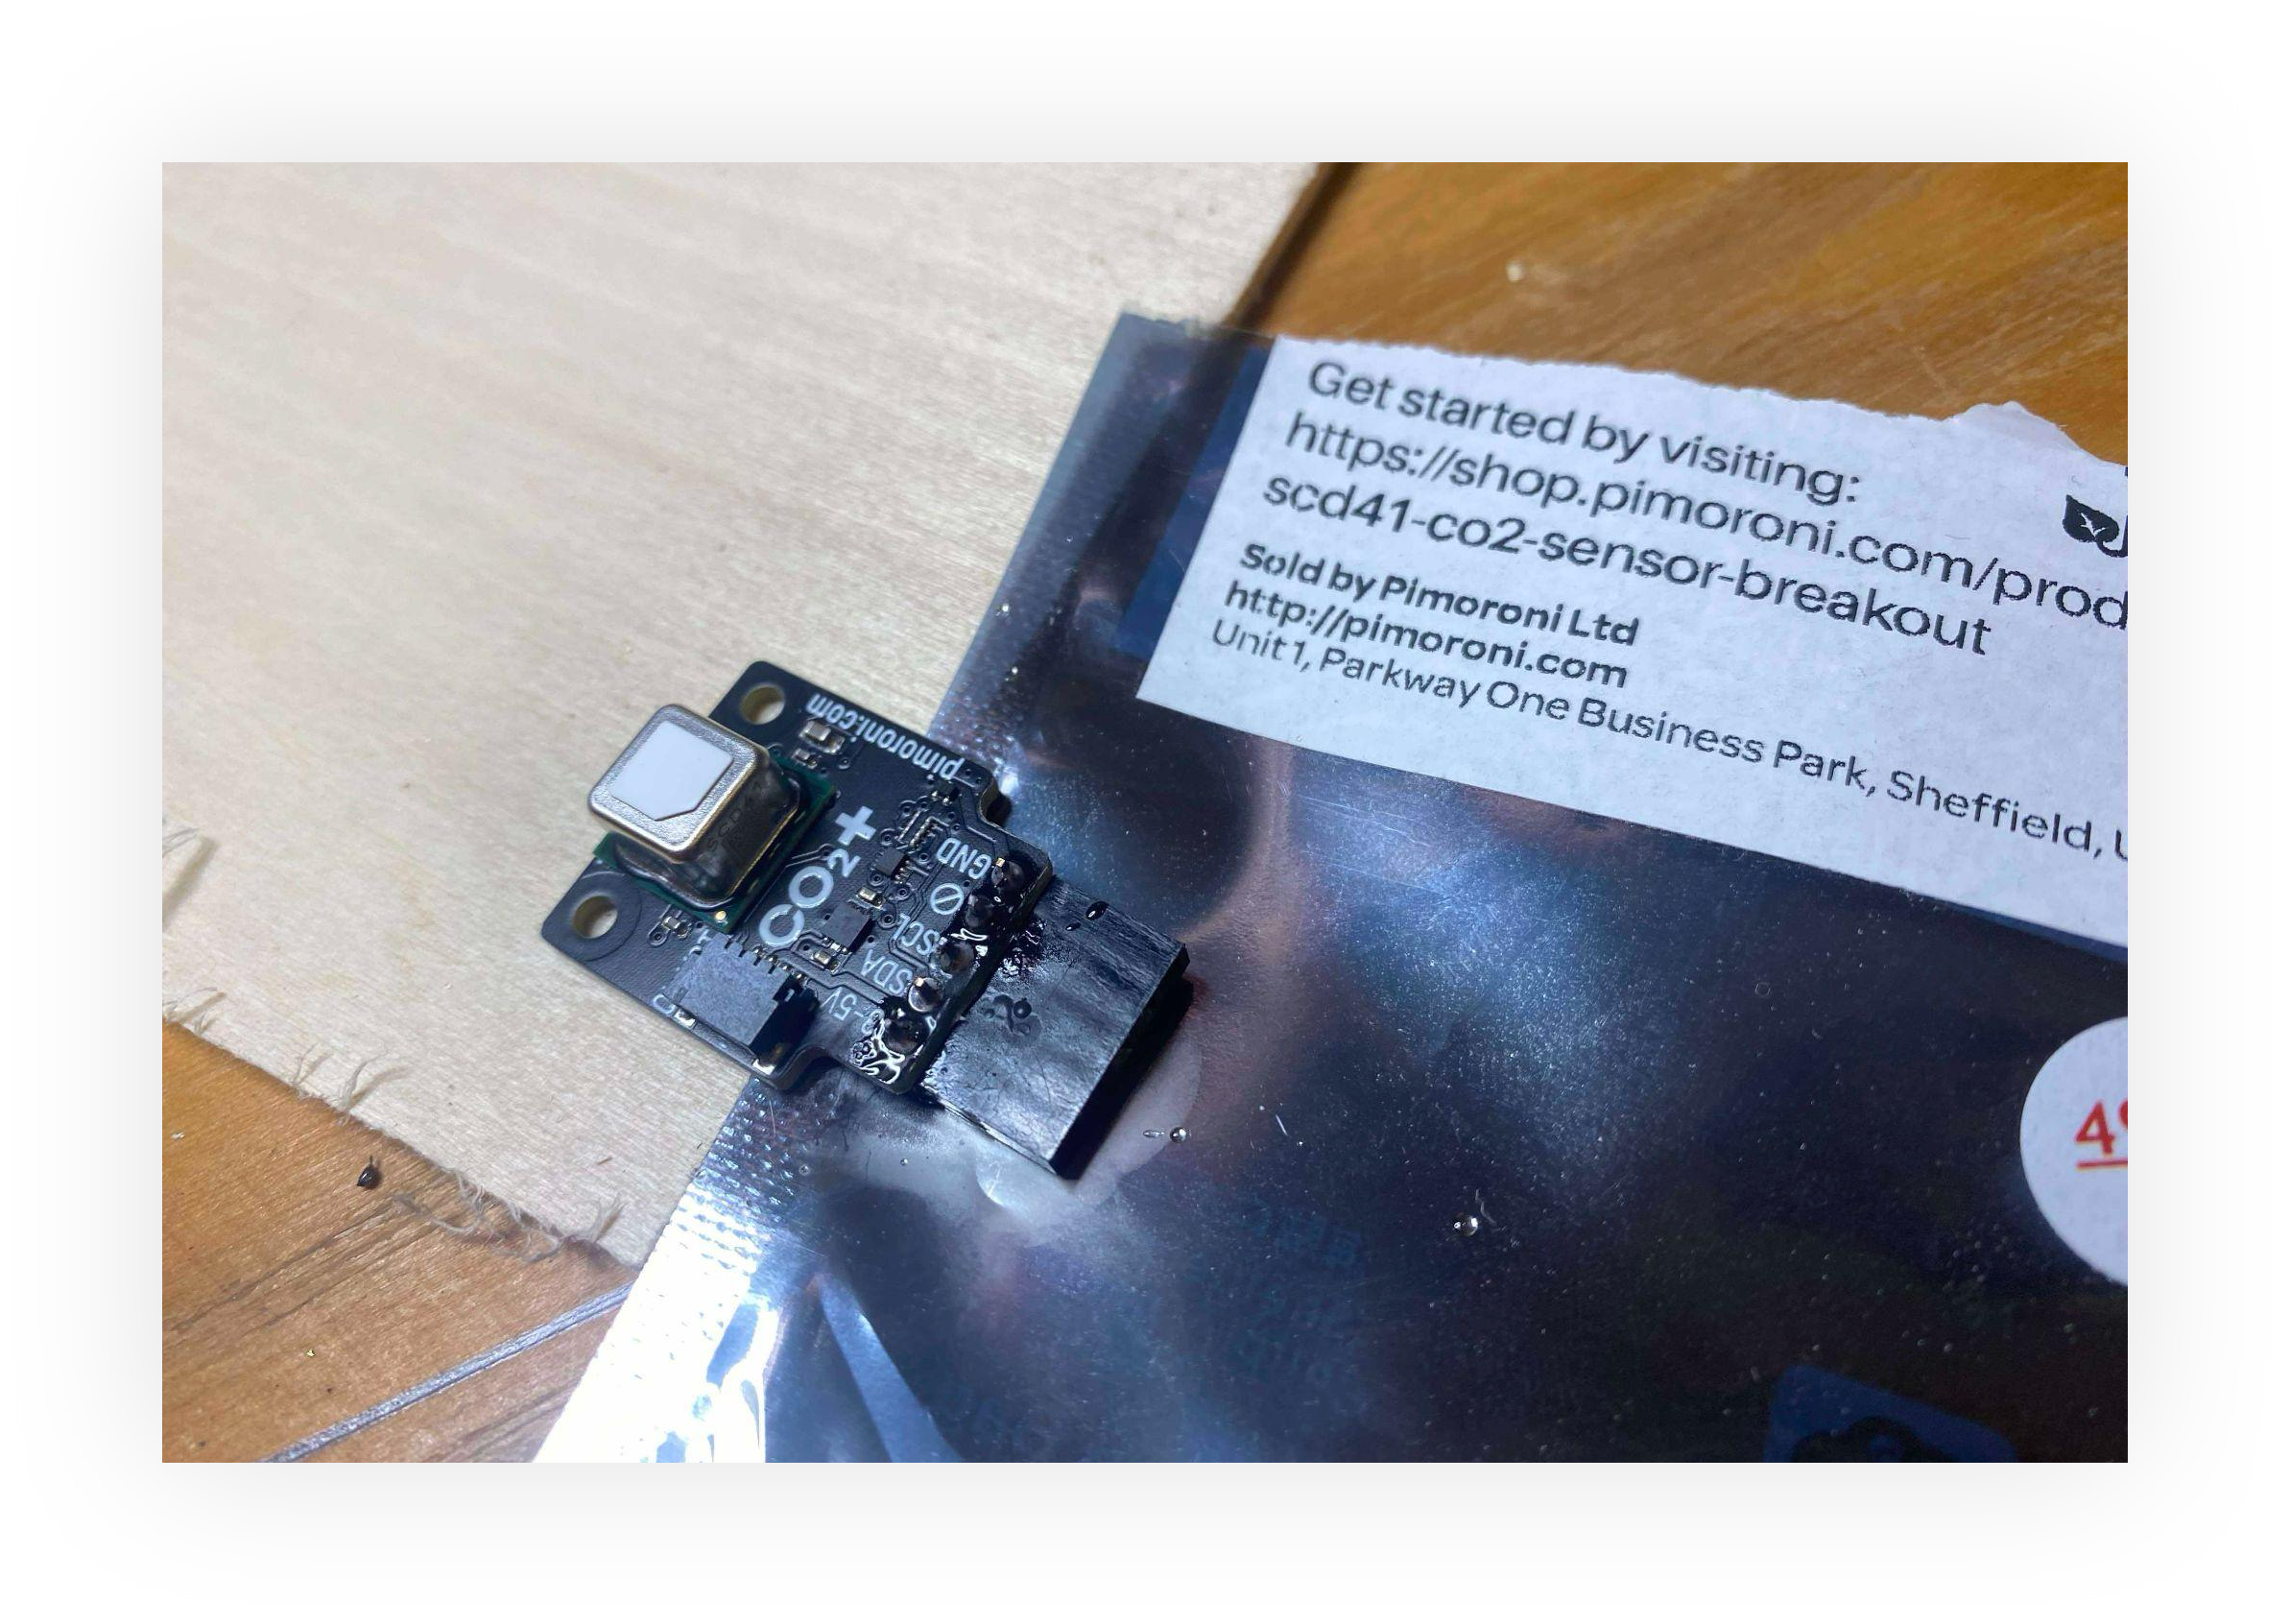
The finished product of my amateur soldering:
Raspberry Pi
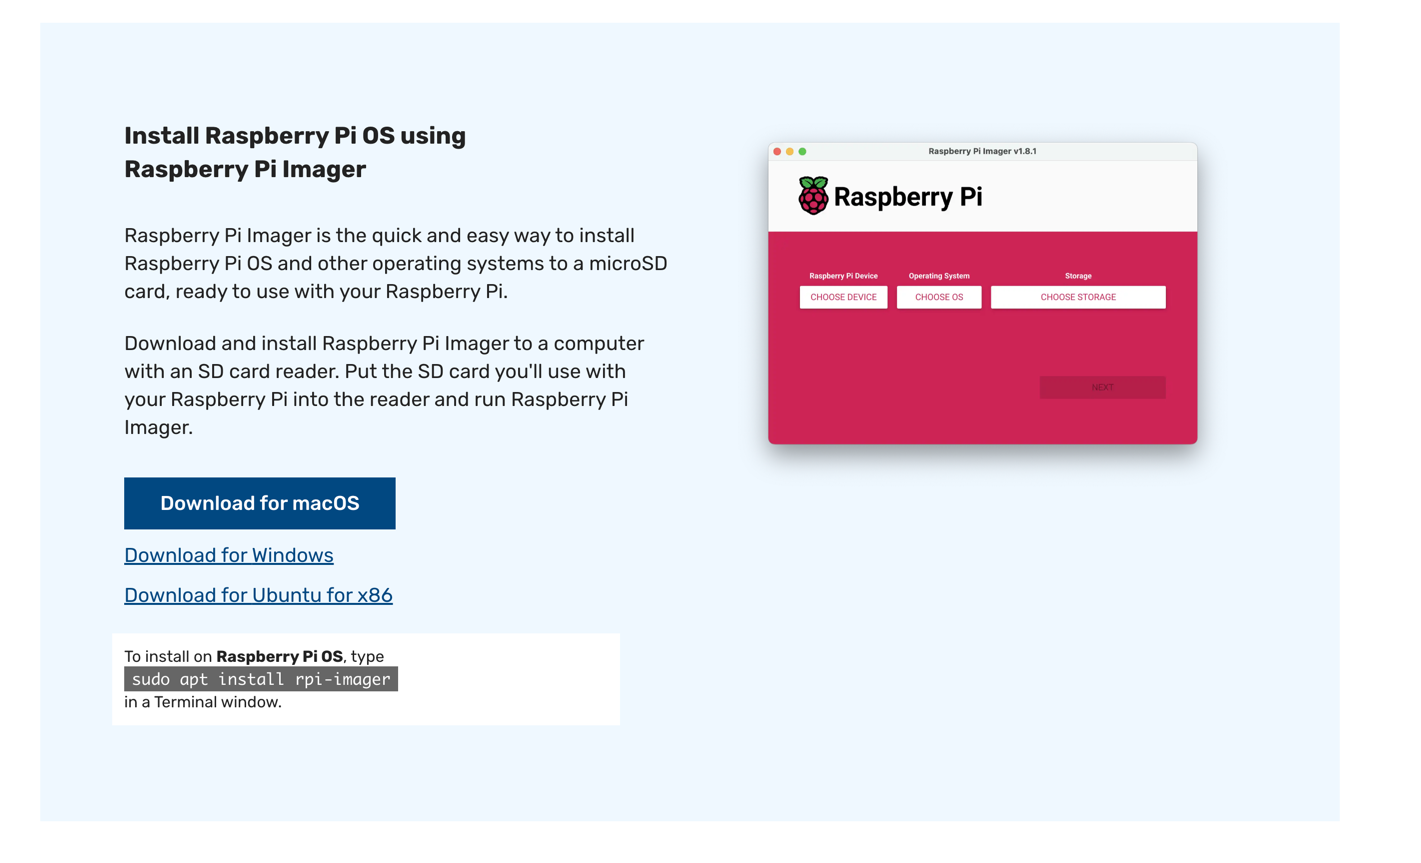
I used the raspberry pi imager to install Ubuntu onto my micro SD card. The pi imager was excellent to use and allowed me to configure the username & password and the network authentication details. This meant once I powered on the pi, it would connect automatically to my wifi and then I could ssh in with my username and password.
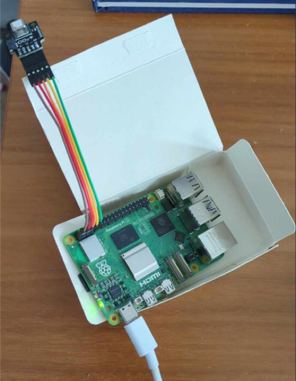
Wiring
Now I was ready to plug the sensor in and start coding. I first wanted to be able to get some readings and print them to the terminal as a 'hello world' first step.
And it worked!
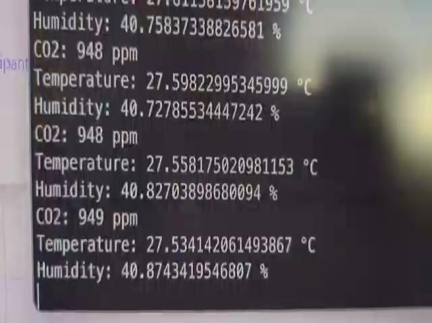
sort of.
My sensor and code was claiming it was 27.5°C in November. in Ireland. More importantly in Ireland.
This was my rookie mistake as a software engineer having his first hardware project. The issue was the heat from the pi was impacting the sensors readings. I used some jumper wires to connect the sensor to the pi and that fixed the issue.
Code
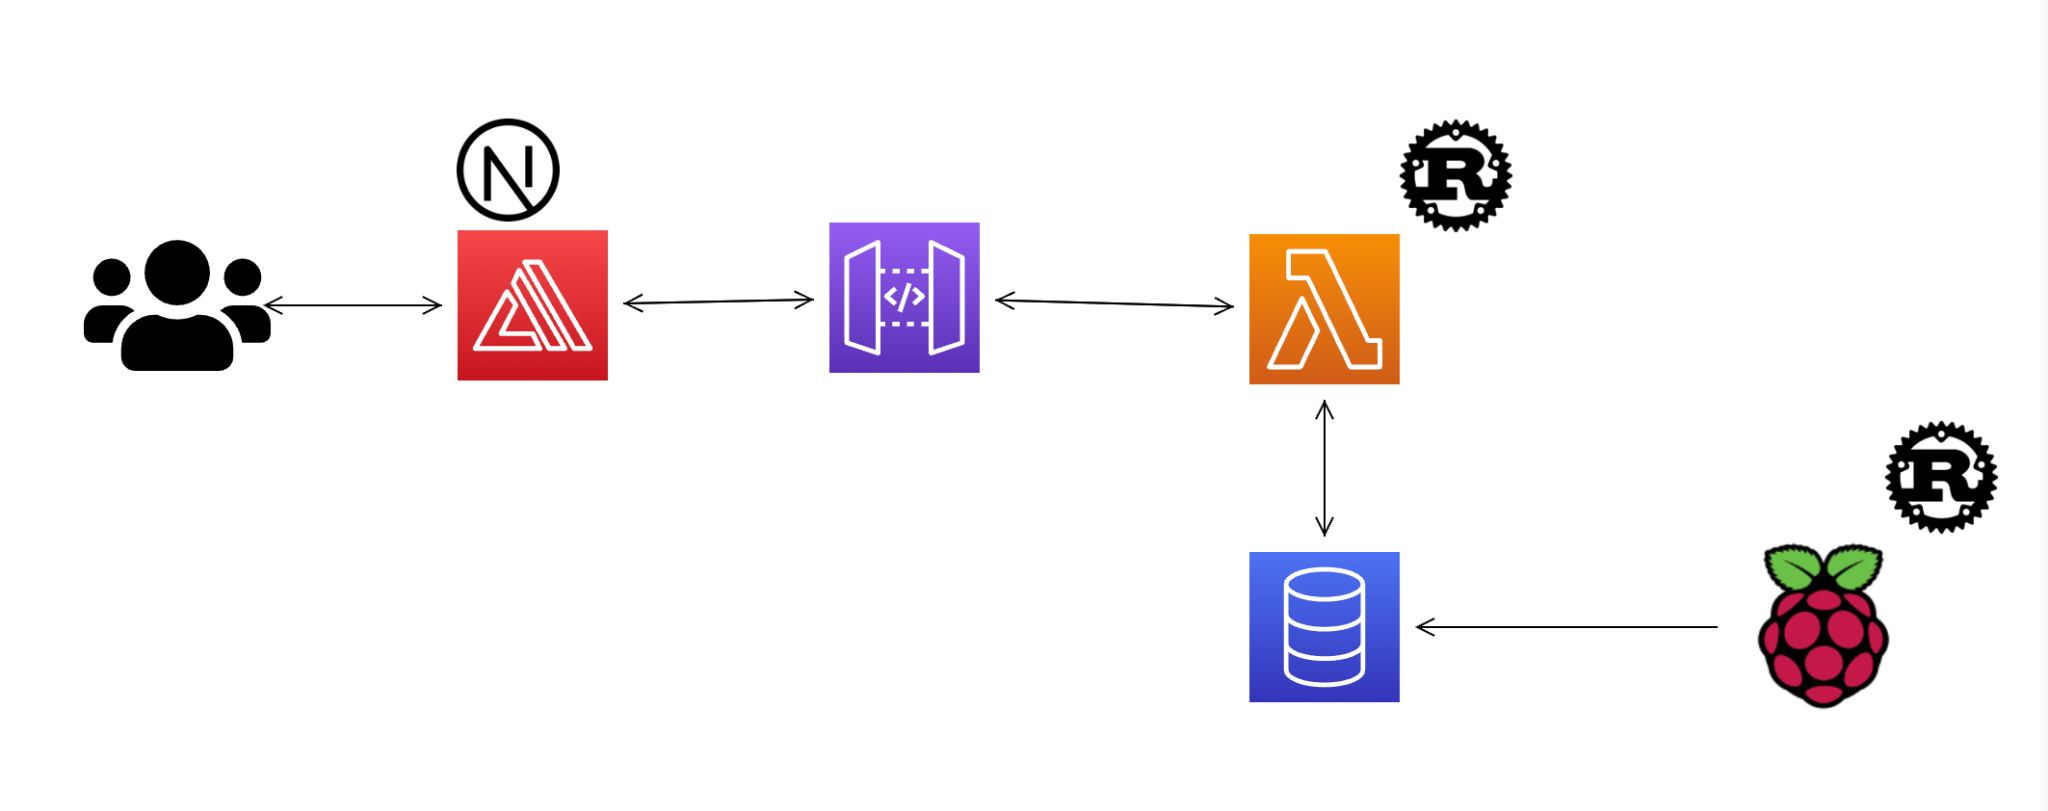
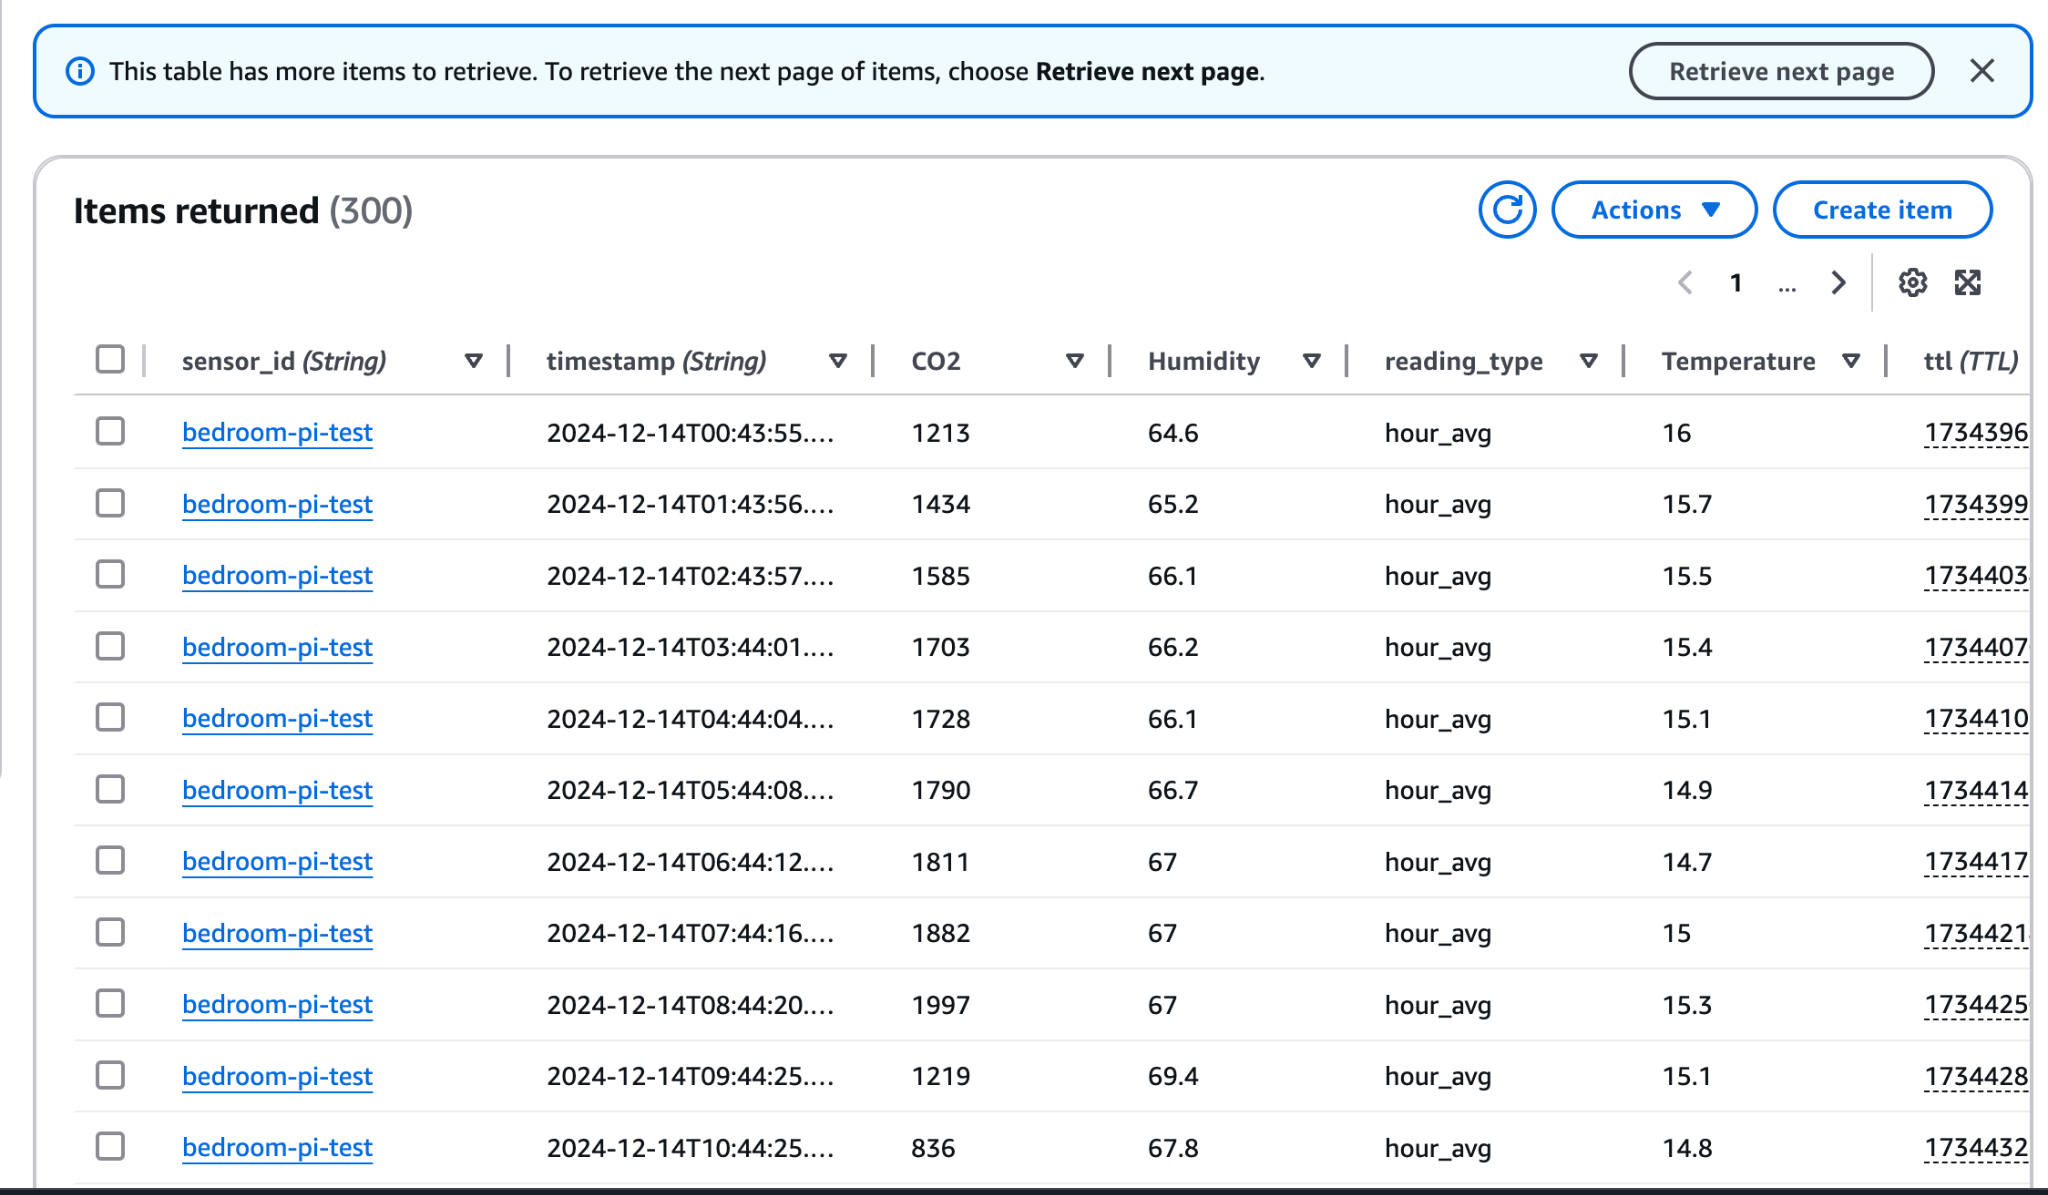
I wrote a rust app to read the data from the sensor and write it to AWS DynamoDB. To get rid of old data I used DynamoDB's time-to-live (ttl) feature. For example, for a 1 hour average reading I set the ttl to 72 hours.
I wrote a Rust lambda to read the DynamoDB table and return the data to the front end app to be presented.
The front end is written in NextJS, TypeScript and Tailwind and deployed with AWS Amplify.
I wrote my AWS infrastructure with AWS CDK in TypeScript. This set up is now my go-to for side projects so I was able to build this project much quicker than my previous projects.
System Service
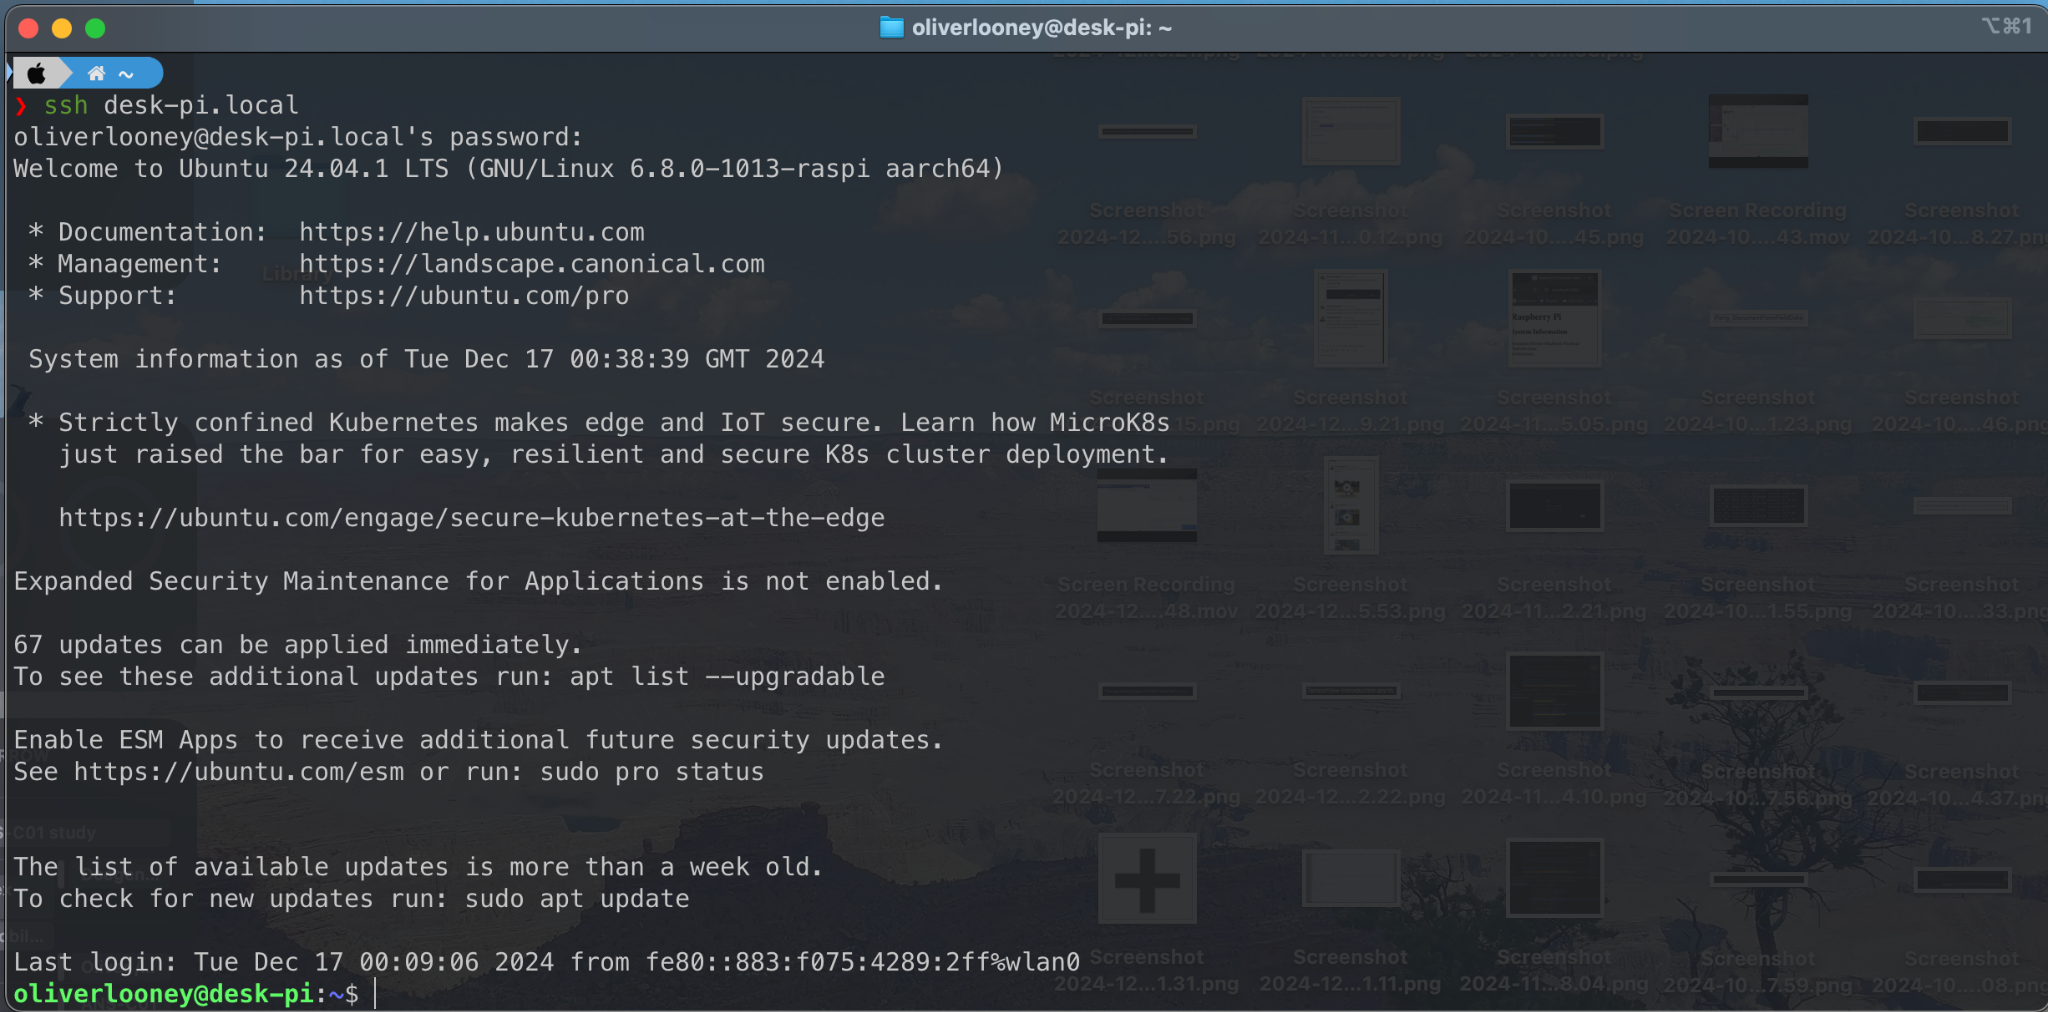
I deployed and tested the code by sshing into the pi from my MacBook:
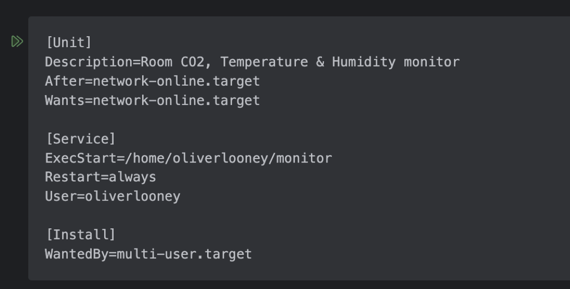
An important feature I wanted was to be able to 'auto start' the co2 monitor whenever I unplugged and plugged in the pi to power without the 'faff' of having to ssh in and start the code.
I did this by creating a system service that would start my rust executable whenever the pi connects to wifi. This step is needed because the rust executable writes the data read to DynamoDB in AWS.
Results
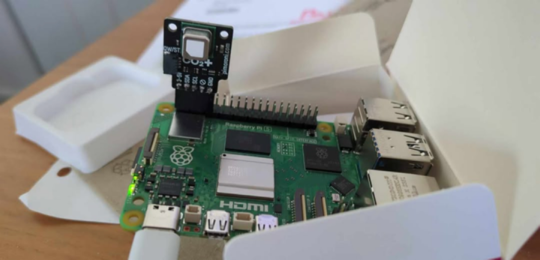
Here is the finished product:
Above is a 4GB Raspberry Pi 5 w/ an active cooler & an SCD41 CO2.
Below is the AWS architecture:
Here is an example of how the DynamoDB table looks:
Why did I build this
I was inspired to care about the CO2 levels in my room, where I work, because of this YouTube video on Tom Scott's channel about the affects of CO2 at different concentrations.
I now regularly check the co2 monitor and open my door or windows (depending on the temperature outside) when the CO2 level gets high. I also usually check to see the CO2 level over night when I wake up to see how much builds up while sleeping depending on open or closed windows.